
.jpg)
Project North & True North in Revit: Step-by-Step Guide for Beginners
Introduction: Why North Matters in Revit
When you start modeling in Revit, you may not think much about orientation. The software opens with a default “north” direction, and you begin placing walls, doors, and windows. But here’s the catch: that “north” isn’t necessarily the real-world north.
In architecture, north orientation is crucial. It affects how drawings are documented, how site plans align with surveys, and even how sunlight falls on a building. Without the right setup, your drawings might look fine on paper but fail to represent reality.
That’s where Project North and True North come in. Project North is your friend during drafting—it makes floor plans neat and easy to read. True North, on the other hand, lines up your project with the actual site orientation. In this guide, we’ll explore what these two settings mean, why they matter, and how to use them effectively.

Step 1: Understanding Project North and True North
Before diving into the “how,” let’s clear up the “what.”
-
Project North is the orientation you use for drafting and documentation. In most projects, Project North means the top of the sheet points up, making plans easy to read and align on sheets. It’s practical, not geographic.
-
True North is the actual geographic north of the site. It matches the orientation you’d see on a survey drawing or compass. True North is important for sun studies, energy analysis, and real-world alignment.
Think of it like this: Project North is about clarity for humans, while True North is about accuracy for the planet. Both matter, but in different contexts.

Step 2: Adding a North Arrow Symbol to Your Site Plan
To avoid confusion, it’s good practice to show north arrows on your drawings. This makes it clear whether the view represents Project North or True North.
Here’s how to add one:
- Go to Insert → Load Family.
- Navigate to Annotations → North Arrow.
- Choose a north arrow family and load it into your project.
- In your site plan, go to Annotate → Symbol → North Arrow.
- Place the symbol and rotate it to the right degree.
This step is simple but powerful. A clear north arrow prevents misunderstandings between architects, engineers, and contractors. Just remember: rotating the arrow only changes the symbol, not the actual building orientation.
Step 3: Rotating the Building to True North
Now comes the more technical part—aligning your building with the real-world north.
- Locate the Project Base Point. You’ll find it in your site plan, usually represented as a circle with an “X.” Move it to a logical reference point, like a building corner.
- Unpin the Survey Point. By default, the survey point is pinned. Click the small pushpin to unlock it.
- Switch the orientation. In the Properties panel of your site plan, change “Orientation” from Project North to True North.
- Rotate True North. Go to Manage → Project Location → Rotate True North. Enter the angle by which the site is rotated compared to Project North.
Once done, your site plan reflects the real-world orientation. Importantly, your floor plans and sheets remain aligned with Project North, so documentation stays neat.

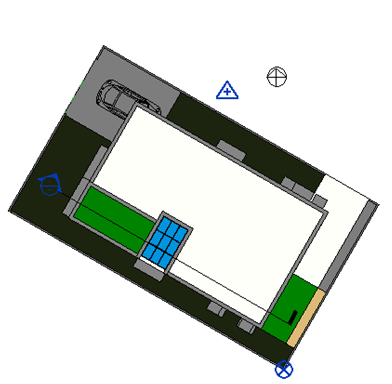
Project base point shows the Direction of the North point of the site.
Add the North symbol by Inset – Load family – Annotation – North Arrow

By above means 2d North point symbol is added to the site.

In order to place this, go to Annotate – Symbol – North Arrow (Select the arrow loaded)

Now we can rotate this North arrow symbol to desired angle such as for example 60°

But the building plan is not rotated to this True North.
How to rotate the Building to the True North?
Project base point and survey point should be set accordingly.

Move the Project Base point to the building corner point.
 Unpin the Survey point.


Step 4: Effects of True North on Shadows and Sun Studies
One of the biggest reasons to set True North is sunlight. Revit calculates shadows based on the geographic location and True North orientation.
If you leave everything aligned with Project North, your shadow studies won’t match reality. Imagine presenting a daylight analysis where the sun rises in the west—your client won’t be impressed.
By rotating your model to True North, shadows fall correctly. This is critical for:
- Sustainability analysis: Understanding solar gain.
- Daylighting studies: Designing with natural light.
- Renderings and presentations: Showing realistic sunlight.
The best part? You can switch views back to Project North for documentation without losing the correct shadow orientation.
Step 5: Best Practices for Using Project North & True North
With practice, you’ll know when to use each north. Here are a few best practices:
- Draft with Project North. Keep plans aligned to the sheet for readability.
- Switch to True North for site plans. Always use True North for site drawings, shadow studies, and analysis.
- Coordinate with survey data. Double-check orientation against official survey drawings.
- Don’t rotate unnecessarily. Over-rotating models can confuse collaborators.
The golden rule is: use Project North for humans, True North for the earth.
Common Mistakes and How to Avoid Them
Many beginners stumble here. Let’s highlight some pitfalls:
- Mixing up Project and True North. This leads to wrong shadows and incorrect site orientation.
- Forgetting to unpin survey points. Without unpinning, you can’t adjust the site orientation.
- Rotating the whole model. Beginners often try to rotate the building geometry itself instead of adjusting the north setting. This causes huge headaches in sheets and views.
- Not checking before printing. Always verify north settings in your sheets before submitting or printing.
Avoiding these mistakes saves you time, effort, and embarrassment.
FAQs on Project North & True North in Revit
What’s the main difference between Project North and True North?
Project North makes drawings easy to read. True North aligns your project with the real world.
Will rotating True North affect my floor plans?
No. Only site plans and sun studies are impacted.
Do I always need to set True North?
Yes, if you’re working with site drawings or environmental analysis. Otherwise, Project North is fine.
Can a project have both Project North and True North?
Yes. Revit allows you to toggle between them in different views.
Conclusion: Mastering North Orientation in Revit
At first, the idea of Project North and True North might seem confusing. But once you break it down, it’s simple. Project North is for neat documentation, while True North is for real-world accuracy.
By setting up both properly, you ensure your drawings are easy to read and technically correct. Clients see accurate shadow studies. Contractors get clear site plans. And you avoid confusion between the design studio and the construction site.
Mastering Project North & True North in Revit isn’t just a technical step—it’s a professional one. It shows you care about both clarity and accuracy in your work.


.jpg)
.jpg)
.jpg)

.jpg)
.jpg)

.jpg&description=Project North & True North in Revit: Step-by-Step Guide for Beginners)
0 Comments